How to Format Attorney Signature Blocks in Answers Perfectly in Word Every Time
Learn how to use Word tables instead of tabs and spaces to create perfectly formatted attorney signature blocks in legal answers that are easy to maintain and update.
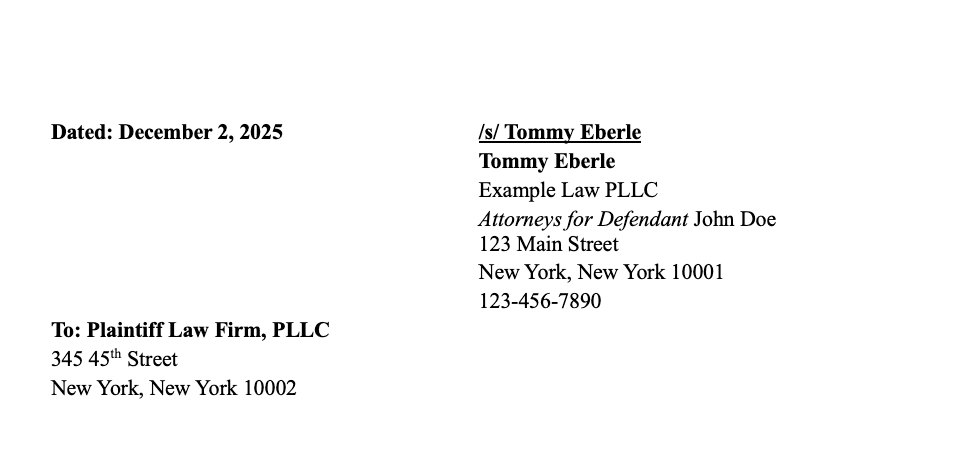
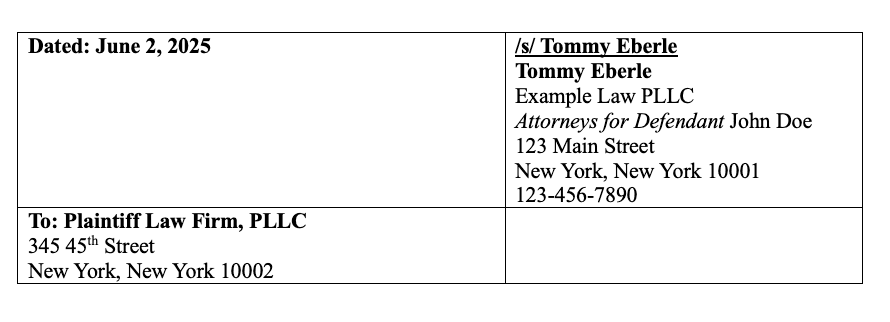
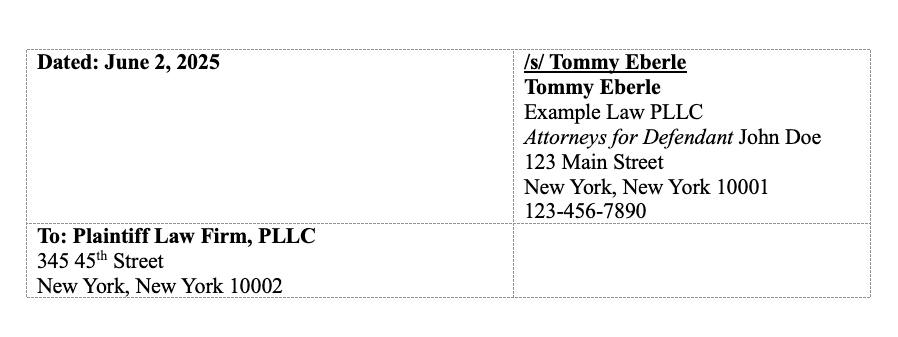
Every Answer needs an attorney signature. They are tricky to format. In Word, there are a few ways to do this. In New York state pleadings, it's common to see the filing attorney's signature on the right and the opposing attorney's name/address on the left. Often, there is also a date on the left of the page.
Good old tabs and spaces
This is the most straightforward approach. Any text that needs to be justified on the left can be added directly at the start of each line. Any line containing text that needs to be justified on the right can be started with tabs and spaces.

We can have word visually display tabs/spaces by selecting this paragraph icon in the "Home" menu on the top. Let's take a look at that signature block again:
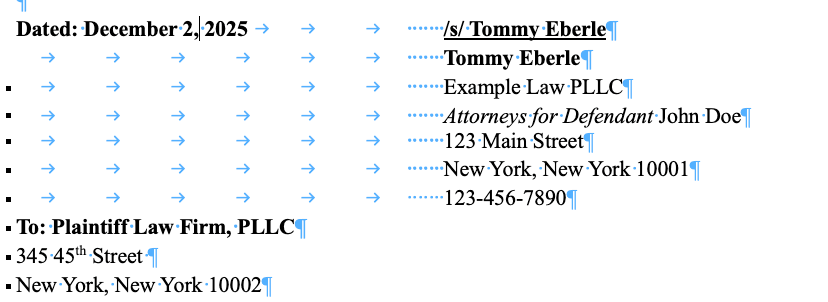
The date and the signature are on the same line. I manually inserted 3 tabs and 7 spaces after the date. That's 10 presses total on the keyboard! For the rest of the lines under the defendant attorney signature I put 6 tabs and 7 spaces. What if I need to change the date to something like June 2nd?
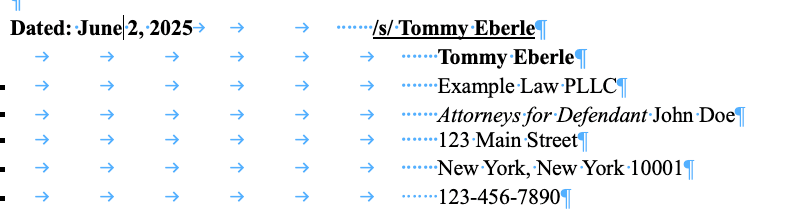
The signature moved to the left! I can go ahead and fix this by adding a new tab (that would be 4 in total) in between the date and the signature. But this means I'll have to manually update the spacing any time the amount of space the date takes changes.
What if I decide that the signature block is too far to the left? I'll have to go line by line and manually remove or add spaces/tabs. I'll also have to manually make sure I added exactly the same amount of tabs/spaces to each line. It's very easy to make a mistake doing this.
Tables to the rescue
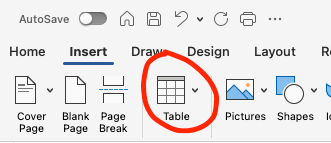
Luckily, we can get rid of these formatting issues by using Tables in Word. Tables have a fixed number of rows and columns. We can set the width/height of each cell precisely. We can let the tables do the hard work for us. To add a table, click on the "Insert" tab in the top of Word. Then, select Table:
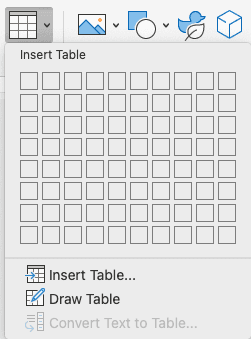
In this window, we can specify exactly how many rows/columns we want. For a signature block, I'm going with a 2x2 table.

You'll notice that this creates a table with borders around each cell. Don't worry - we can hide this later. Within a cell in a table, you can insert text just like anywhere else in a document:

Notice how when we insert text into a cell on the right, our cursor will start at the left of the cell. This is exactly what we want. No more manually adding 3 tabs and 7 spaces! If we want to change where the right cells will start, we can move our cursor to the middle line and select it. Then, we can simply drag right/left until the spacing looks good.

It can also be helpful to enable the ruler at the top of the screen. This will allow us to see exactly how many inches each part of the document takes. You can enable this by going to "View —> Ruler". You'll see it at the top of the document:

Let's go ahead and add in the rest of the text:
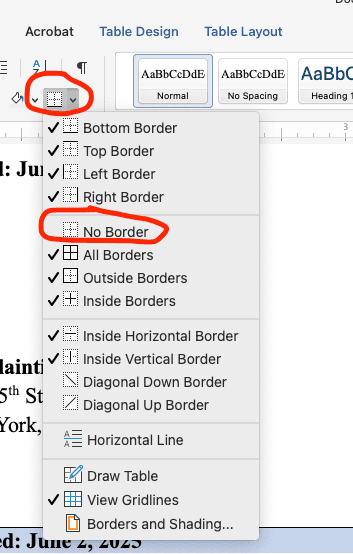
This is looking good, but the borders are still visible. To get rid of these, first select the entire table. You can do this by clicking on this white icon in the top left corner of the table:
![]()
Then, in the top bar, click on "no border" under the table drop down:
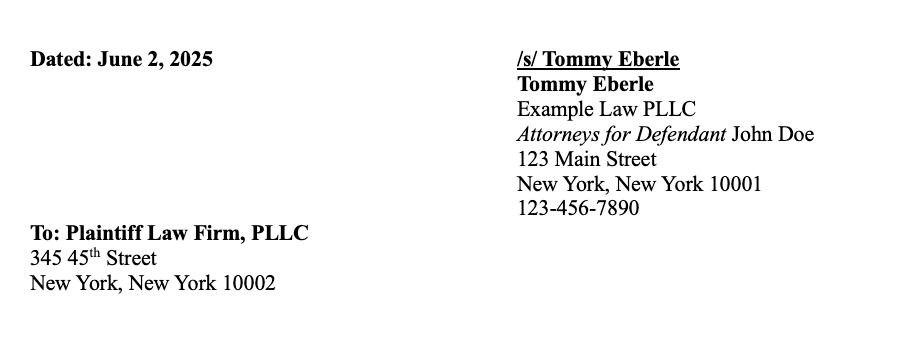
Your table should look like this after "no border" is enabled. On the final document that gets submitted to court, we don't want these borders. However, it can be helpful to see the cell borders when drafting the document. You can enable "Grid view" for tables which will let us see the border ONLY while we are drafting. Once we export the document to a PDF, these will NOT be visible. In the top bar, select "Table layout". Then, click on "View Gridlines":

Now we can see the gridlines.
Using tables effectively should make it much more efficient to draft pleadings and other documents. While it might not seem like THAT big of a deal to manually add 6 tabs and 7 spaces, these little things add up quickly. Especially when you are drafting hundreds of these documents per month. Not to mention the possibility of errors.